
I’m looking at the thermostat hanging on the deck and can’t believe my eyes… It’s almost fifty degrees out in Boson and the sun is shining! The change in weather is calling me to begin organizing my garden tools in the shed and plan my list for what I’ll need at the garden center. Rakes, trowels, mulch and other odds and ends will have to be bought but this year due to all of the snow, I’m going to need to replace a few things in the yard. One fixture that will be at the top of my spring chores is rebuilding the several raised beds that unfortunately couldn’t take the severe winter that just passed. Pre-made box gardens can be extremely expensive and can range in cost anywhere from fifty to several hundred dollars. For me, it’s just not worth the expense so I prefer to pick up a hammer and nail and create them myself.
Without becoming anxious about the task, I’ll make sure that I design an accurate blueprint of what supplies will be needed and a clear list of steps for construction so I’m not wasting precious time that I could be spending elsewhere. If you’re like me, you might be in the same predicament but don’t worry. It doesn’t matter if you’ve never been a do-it-yourself kind of a person because there is an easy and affordable method that I’ve found. See if this works for you, too and soon you’ll be planting and weeding before you know it!
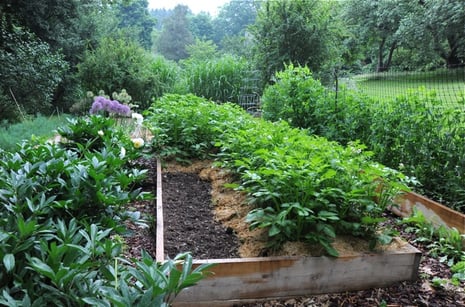
photo credit: awaytogarden.com
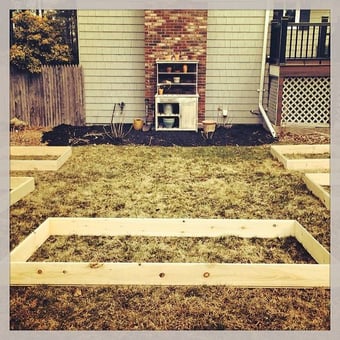
Visit a trusted home improvement store in your area and grab a cart to make selection and transportation of the materials simpler. To make one raised bed, find the lumber department and browse the different varieties of wood that are in stock. Depending on your green thumb’s tenacity, pick a length that will suit your needs. My previous boxes measured at eight feet long, which provided ample space for a large variety of flowers and vegetables. The height of the lumber reached six inches that might seem too short but worked well once the soil was added. The width of the wood was cut much shorter than the length, which was half in size at four feet. The rectangular shape was perfect and enabled me to make a pretty pattern with three other boxes erected in a square allowing me to set up a table and chair in the center. Now I bet your asking what type of wood should you buy? Well, there are a lot of options including cedar, oak, pine and reclaimed wood. Keep in mind that the price will fluctuate with the variety you choose so be sure to ask a salesperson what the total will be before you bring them to the register.
Once you’ve bought your wood, take the pieces home and arrange them in the size and shape that you would like the beds to be in. Then take a four-inch nail and attach the corners of the sides in a ninety-degree angle. You will need two nails per corner, one for the top and one for the bottom. Once they have been constructed, place in the location that you want them to be displayed. After they have been filled with soil, you wont be able to move them so choose wisely. The last step is to fill them with an earth friendly soil mix and begin planting!
Suzie Canale
Westwood, MA